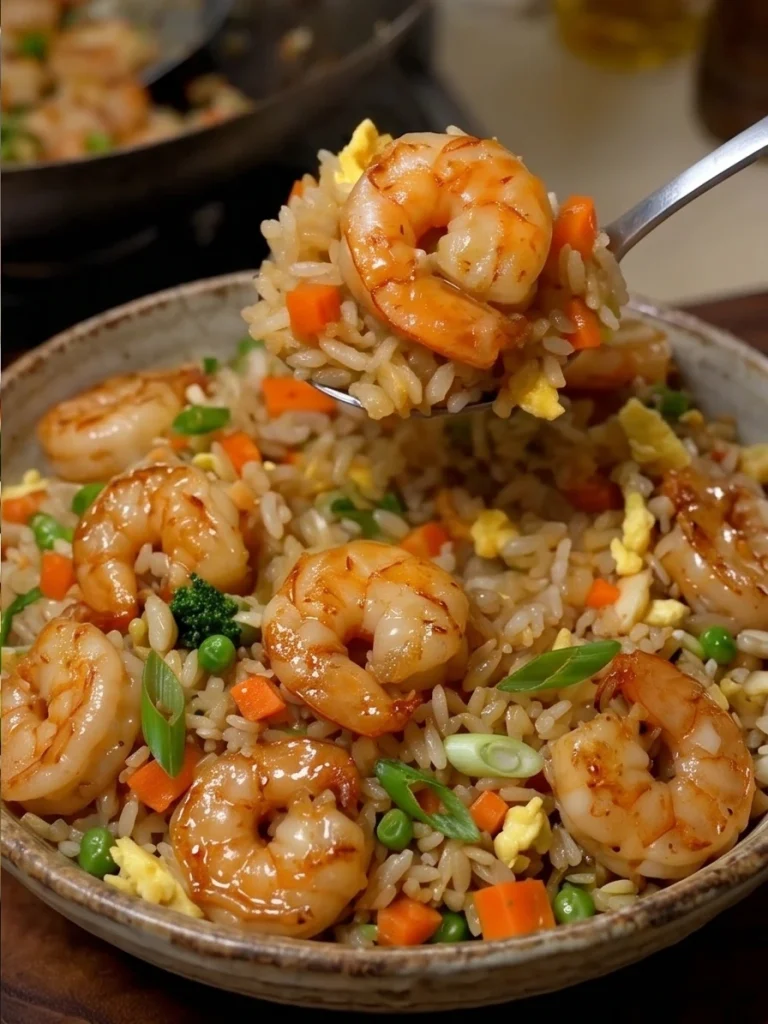
Some nights call for takeout. Other nights you realize you can make something better at home in the same amount of time it takes to place the order. This shrimp fried rice is one of those recipes — faster than delivery, significantly better than the box, and deeply satisfying in a way that only homemade can be. Tender shrimp, fluffy scrambled eggs, colorful vegetables, and every grain of rice coated in a savory soy and sesame sauce that tastes exactly like your favorite restaurant version. Ready in just 30 minutes in one pan.
Simple ingredients, bold flavors, and a result that makes everyone at the table genuinely happy. This is the weeknight dinner that earns a permanent spot in your rotation from the very first bite.
Why You’ll Make This Again
The secret to genuinely great fried rice is something most home cooks overlook — the rice. Day-old or chilled rice is drier than freshly cooked rice and fries rather than steams in the hot pan, developing a satisfying texture and light char on each grain that makes homemade fried rice taste exactly like the restaurant version. Combined with the high-heat stir-fry technique, the soy sauce, oyster sauce, and sesame oil coating every single grain, and those tender pink shrimp and fluffy egg pieces scattered throughout — the result is a bowl of fried rice that is genuinely better than most takeout you have ever ordered. Once you make this you will never reach for the delivery app on a weeknight again.
This recipe works beautifully all year round as a quick weeknight dinner but is especially useful for using up leftover rice from the night before. The more chilled the rice, the better the final result.
How This Comes Together
Cook each component separately — shrimp first, then eggs, then vegetables and rice — then bring everything back together with the sauce at the end. Cooking each element separately is the technique that makes this fried rice genuinely great rather than just good — it ensures perfect texture for every component instead of everything steaming together into a grey, overcooked mess. It takes a few extra minutes but the difference in the final dish is completely and entirely worth it. Straightforward, beginner-friendly, and completely reliable from the first pan to the last forkful.
What You’ll Need
Simple pantry and fridge ingredients. The most important preparation is having day-old or thoroughly chilled cooked rice ready before you start — plan ahead and cook the rice the day before for the best possible result.
- 1 lb shrimp, peeled and deveined
- 4 cups cooked and chilled rice
- 1 cup mixed vegetables (carrots, peas, and broccoli)
- 2 large eggs, lightly beaten
- 3 green onions, sliced
- 3 cloves garlic, minced
- 2 tbsp vegetable oil, divided
- 3 tbsp soy sauce
- 1 tbsp oyster sauce
- 1 tsp sesame oil
- 1/2 tsp black pepper
- Salt, to taste
Step-by-Step Directions
Step 1: Prepare the Ingredients
Prepare the shrimp, minced garlic, mixed vegetables, sliced green onions, beaten eggs, and chilled rice so everything is ready to cook.

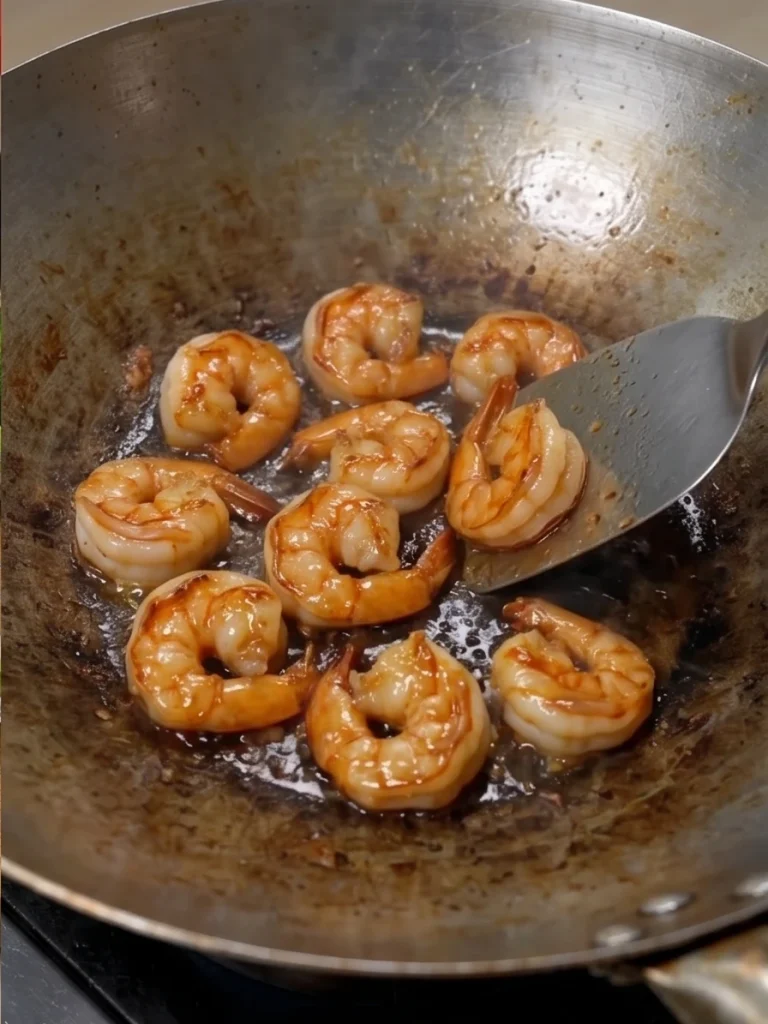
Step 2: Cook the Shrimp
Heat 1 tablespoon of vegetable oil in a large skillet or wok over medium-high heat until shimmering. Add the shrimp and cook for 2–3 minutes per side until pink, opaque, and lightly browned. Remove from the skillet and set aside.
Step 3: Cook the Fried Rice
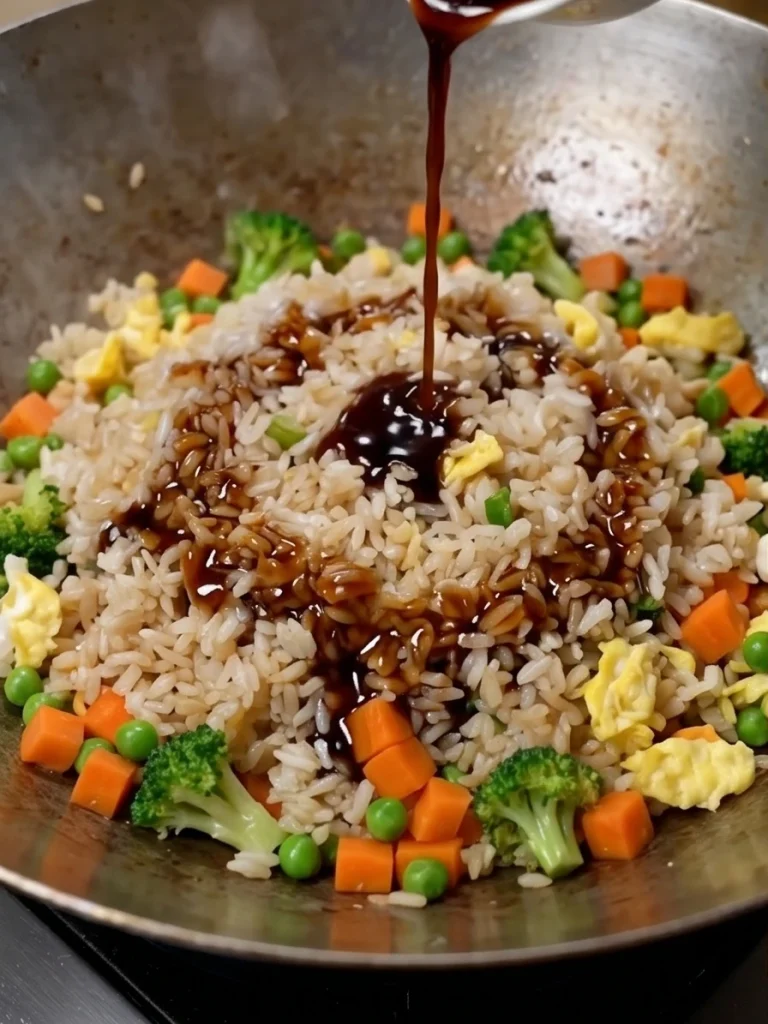
Add the remaining tablespoon of vegetable oil to the same skillet. Pour in the beaten eggs and scramble until just set but still slightly soft. Remove and set aside with the shrimp. Add the minced garlic and mixed vegetables to the skillet and stir-fry for 2–3 minutes until the vegetables are tender and the garlic is fragrant. Add the chilled rice and cook for 3–4 minutes, breaking up any clumps and stirring frequently, until the rice is heated through and beginning to toast lightly. Stir in the soy sauce, oyster sauce, sesame oil, and black pepper. Toss everything together until the rice is evenly coated in the sauce.
Step 4: Finish and Serve
Return the cooked shrimp and scrambled eggs to the skillet and toss everything together to combine. Cook for another 1–2 minutes until everything is heated through. Stir in the sliced green onions and adjust salt to taste. Serve hot immediately.
How to Serve It
Scoop generous portions directly from the pan into wide bowls or onto plates while still steaming hot. A drizzle of extra sesame oil, a few extra sliced green onions, and a sprinkle of sesame seeds over the top makes each bowl look as good as any restaurant presentation. Serve alongside a simple cucumber salad or a bowl of miso soup for a complete Asian-inspired dinner that feels genuinely satisfying. For a casual family dinner, bring the whole skillet to the table and let everyone help themselves — it looks and smells incredible and always gets a great reaction the moment it arrives.
Leftovers & Storage
Store leftover fried rice in an airtight container in the fridge for up to 3 days. Reheat in a hot skillet with a tiny splash of soy sauce and a drizzle of oil for 3–4 minutes, tossing frequently, until heated through and slightly crisped again. The skillet reheating method is significantly better than the microwave for fried rice — it restores the texture and brings back that light char on the rice that makes every bite so satisfying. The microwave works in a pinch but add a splash of water and cover before heating to prevent the rice from drying out completely. This dish also freezes well for up to 1 month — freeze in individual portions and thaw overnight in the fridge before reheating.
Make It Even Better (Pro Tips)
- Always use day-old or thoroughly chilled rice — this is the single most important rule for great fried rice. Fresh rice is too moist and steams rather than fries in the pan.
- Use the highest heat your stove allows when stir-frying the rice — the high heat is what creates the light char and toasted flavor that defines great restaurant-style fried rice.
- Pat the shrimp dry before cooking — dry shrimp sears into a beautiful pink and lightly browned color rather than steaming and turning grey in the pan.
- Don’t overcook the eggs — scramble until just set and still slightly soft. They continue cooking when returned to the hot pan at the end and perfectly soft eggs in the finished rice is the goal.
- Add the sesame oil at the very end rather than cooking it from the start — sesame oil has a low smoke point and its delicate, nutty flavor is best preserved when added off the heat or at the final toss.
- Break up the cold rice completely before adding to the pan — large cold clumps take too long to heat through evenly and some parts of the rice end up undercooked while others get overly toasted.
- Mix the soy sauce, oyster sauce, sesame oil, and pepper together in a small bowl before adding — pre-mixing the sauce ensures it distributes evenly over the rice in one quick pour rather than unevenly from multiple separate additions.
Easy Ways to Change It Up
- Chicken version: Replace the shrimp with diced boneless chicken breast or thigh — cook fully in the first step and the rest of the recipe stays exactly the same.
- Vegetarian option: Omit the shrimp and add an extra egg and a cup of diced firm tofu for a plant-based fried rice that is just as hearty and satisfying.
- Spicy version: Add a tablespoon of chili garlic sauce or a teaspoon of sriracha to the sauce mixture for a fried rice with a bold, warming heat that is completely addictive.
- Pineapple fried rice: Fold in 1/2 cup of diced fresh pineapple with the vegetables for a sweet-savory tropical twist that pairs beautifully with the shrimp and soy sauce.
- Cauliflower rice: Swap the regular rice for cauliflower rice for a low-carb, keto-friendly version that uses the exact same technique and sauce for equally delicious results.
Quick Questions
Can I use freshly cooked rice?
You can but the result will be noticeably different — fresher rice is too moist and tends to clump and steam in the pan rather than fry into individual separated grains. If you must use fresh rice, spread it on a baking sheet and refrigerate for at least 1 hour before using to dry it out as much as possible. Overnight chilling is always the best approach for the most authentic fried rice texture.
Can I use frozen shrimp?
Yes — frozen shrimp works perfectly in this recipe. Thaw completely in cold water first, then pat very dry with paper towels before adding to the hot pan. Properly thawed and dried frozen shrimp cooks just as well as fresh and is virtually indistinguishable in the finished fried rice. Most shrimp sold in stores is previously frozen anyway so don’t hesitate to use what is most convenient.
Can I substitute the oyster sauce?
Yes — if you don’t have oyster sauce, substitute with an equal amount of hoisin sauce for a slightly sweeter result, or simply increase the soy sauce by an extra teaspoon and add a small pinch of sugar. For a completely oyster-free version, a teaspoon of fish sauce mixed with a little sugar gives a similar depth of savory umami flavor without the oyster. The finished fried rice will taste slightly different but still deeply delicious.
Make this shrimp fried rice tonight instead of ordering takeout and discover how much better homemade always tastes. Tried it? Leave a comment below and tell me what vegetables you added to your pan!— AVA

Easy Shrimp Fried Rice
Ingredients
Equipment
Method
- Heat 1 tablespoon vegetable oil in a large skillet or wok over medium-high heat until shimmering.
- Add the shrimp and cook for 2–3 minutes per side until pink, opaque, and lightly browned. Remove and set aside.
- Add the remaining tablespoon of vegetable oil to the skillet.
- Pour in the beaten eggs and scramble until just set but still slightly soft. Remove and set aside with the shrimp.
- Add the garlic and mixed vegetables to the skillet. Stir-fry for 2–3 minutes until tender and fragrant.
- Add the chilled rice and cook for 3–4 minutes, breaking up clumps and stirring frequently until heated through.
- Stir in soy sauce, oyster sauce, sesame oil, and black pepper. Toss until the rice is evenly coated.
- Return the cooked shrimp and scrambled eggs to the skillet and toss to combine.
- Cook for 1–2 minutes until everything is heated through.
- Stir in the green onions, adjust salt if needed, and serve immediately.