Some recipes feel like discovering a secret that everyone should know. These Nun’s Puffs are exactly that kind of recipe — simple ingredients, a straightforward technique, and a result so dramatically golden, light, and delicious that everyone who tries them for the first time genuinely cannot believe how good they are. Crispy, beautifully domed pastry puffs with a soft, tender, almost custardy center — sprinkled with sugar and drizzled with honey and served warm straight from the oven. Ready in just 35 minutes and completely unforgettable from the very first bite.
Perfect for a special breakfast, a simple dessert, or an elegant brunch addition that always sparks the same delighted reaction — “what are these and how do I make them?” This is the recipe you will make again and again.
Why You’ll Make This Again
Nun’s Puffs are made using the same technique as classic choux pastry — cooking flour directly into hot butter and milk, then beating in eggs one at a time to create a smooth, glossy batter. But instead of piping onto a baking sheet, the batter goes into a greased muffin tin that holds each puff in a perfectly contained cup as it bakes. The high oven heat causes the moisture in the batter to steam dramatically, pushing each puff upward into a tall, beautifully domed, crispy-sided pastry with a soft, pillowy interior that has a subtle richness from the butter and eggs and a gentle sweetness from the optional sugar — and that combination of crispy exterior and soft custardy center is genuinely unlike anything else you can make in 35 minutes. These are the pastries that make people think you are a far more accomplished baker than you actually needed to be.
These work beautifully all year round as a special breakfast treat, a simple dessert with whipped cream and fresh berries, or an elegant brunch centerpiece that requires almost no skill but produces an absolutely stunning result that looks genuinely impressive on any table.
How This Comes Together
Melt butter into milk, cook in the flour, cool briefly, beat in the eggs, fill the muffin tin, and bake. The entire hands-on time is about 10 minutes and the oven does everything else from there. The most critical rule is never opening the oven during baking — the trapped steam inside the oven is what inflates each puff into that dramatic dome and opening the door releases that steam, causing the puffs to deflate before they have had time to set their crispy structure. Set the timer, step away from the oven, and trust the process completely.
What You’ll Need
Just five simple ingredients for the puffs themselves — plus sugar, honey, and optional toppings for serving. Use whole milk for the richest, most flavorful result — lower fat milks produce a slightly less rich puff.
- 1/2 cup unsalted butter
- 1 cup milk
- 3/4 cup all-purpose flour
- 4 large eggs
- 1/2 to 1 tbsp granulated sugar (optional)
- Granulated sugar, for sprinkling
- Honey, for serving
- Whipped cream and fresh fruit (optional)
Step-by-Step Directions
Step 1: Heat the Milk & Make the Dough
Preheat your oven to 400°F (200°C) and generously grease a standard 12-cup muffin tin with butter or cooking spray.
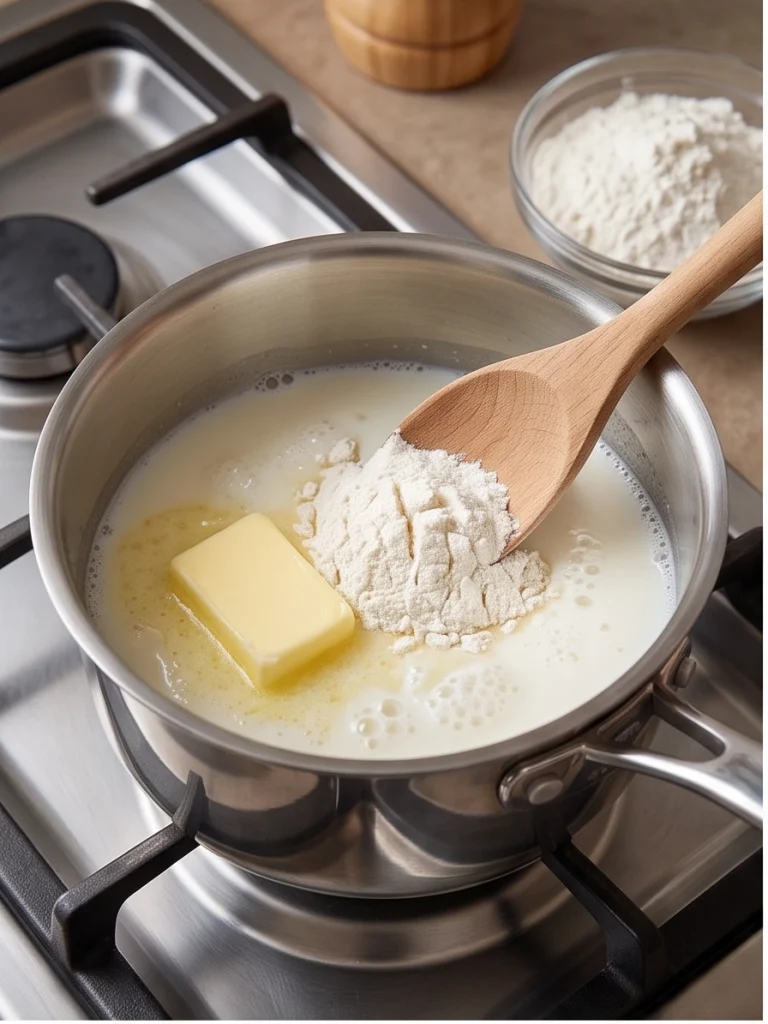
In a medium saucepan, combine the butter and milk over medium heat. Stir occasionally until the butter has completely melted and the mixture just begins to simmer.
Remove the saucepan from the heat and add the flour all at once. Stir vigorously with a wooden spoon until a smooth dough forms and pulls cleanly away from the sides of the pan.
Step 2: Beat in the Eggs
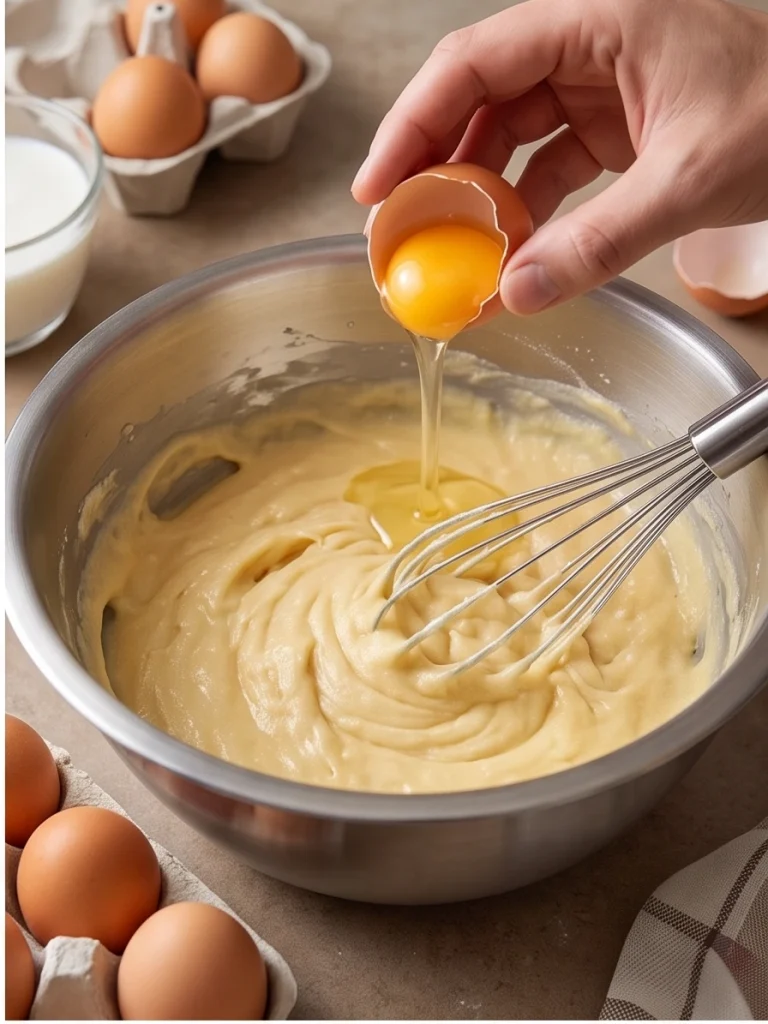
Allow the dough to cool for 3–5 minutes so the eggs won’t cook when added.
Beat in the eggs, one at a time, mixing thoroughly after each addition until fully incorporated before adding the next. Continue beating until the batter is smooth, thick, and glossy. Stir in the sugar, if using, for a touch of sweetness.
Step 3: Fill the Muffin Tin & Bake
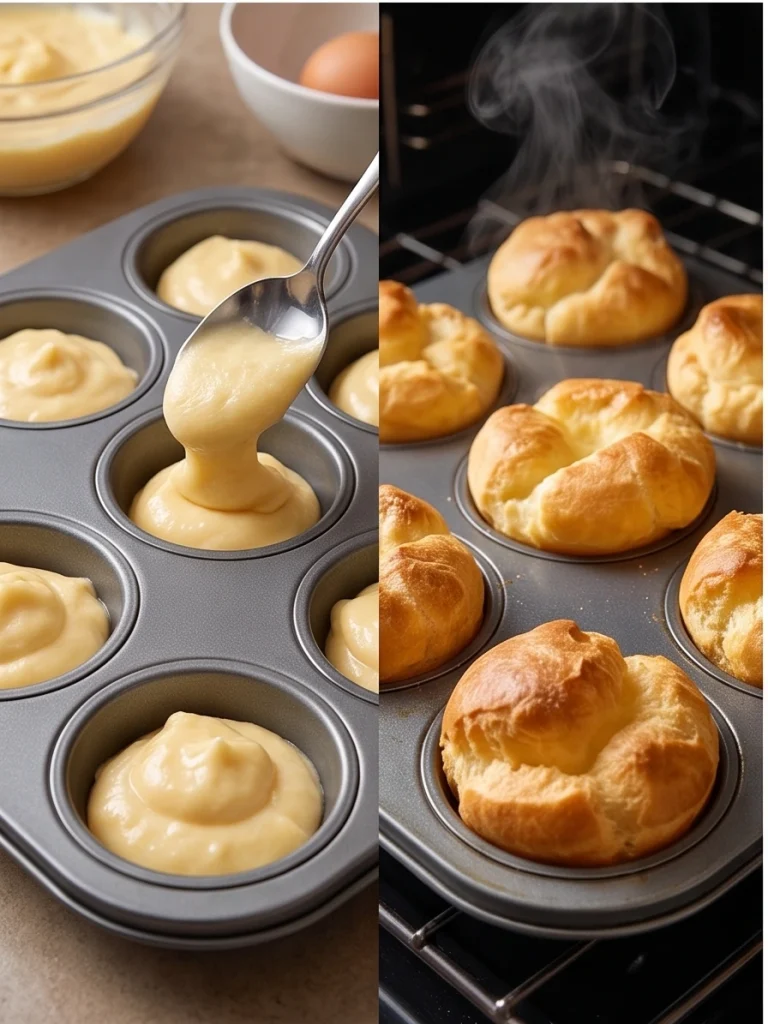
Spoon the batter into the prepared muffin cups, filling each about halfway.
Bake for 20–25 minutes, or until the puffs are tall, deeply golden brown, and crisp on the outside. Avoid opening the oven door during baking, as this can cause the puffs to collapse.
Let the puffs cool in the pan for a few minutes before carefully removing them.
Step 4: Finish & Serve
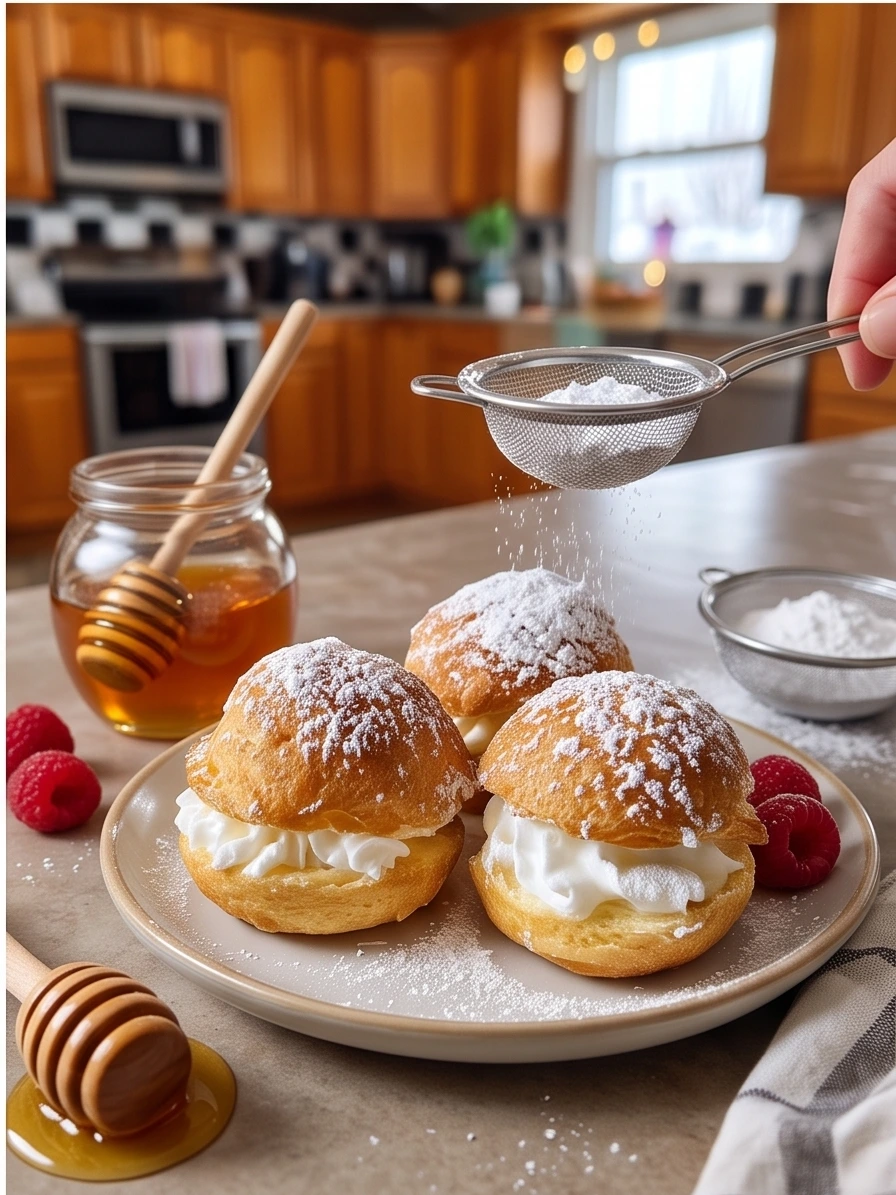
Dust the warm Nun’s Puffs generously with powdered sugar or granulated sugar, depending on your preference.
For an extra-special treat, split them open and fill with whipped cream, then drizzle with honey and serve with fresh berries or your favorite fruit. Enjoy them warm for the lightest texture and best flavor.
How to Serve It
Arrange the warm golden puffs on a large plate or wooden board, sprinkle generously with granulated sugar while still warm so it adheres beautifully to the crispy exterior, and drizzle honey lavishly over the top of each puff. They look absolutely stunning presented this way — the dramatic golden domes glistening with honey and sparkling with sugar make a platter that looks genuinely special and completely irresistible from across the room. For a more elaborate presentation, serve alongside a bowl of freshly whipped cream and a plate of seasonal fresh berries for dipping and piling on top. For a simple weekday breakfast, two or three puffs with a drizzle of honey and a cup of coffee is all you need for a morning that feels genuinely indulgent. For another delightful baked breakfast treat, our Banana Bread Cinnamon Rolls are equally special and equally memorable.
Leftovers & Storage
Store cooled puffs in an airtight container at room temperature for up to 2 days or in the fridge for up to 3 days. Reheat in the oven at 350°F for 5 minutes or in the air fryer at 350°F for 3 minutes to restore the crispy exterior and warm the soft interior through. The puffs lose their crispy exterior as they sit and become softer overnight — they are genuinely at their most spectacular within 10 minutes of coming out of the oven, so timing them to be freshly baked when you are ready to serve is always the best approach. They do not freeze well — the texture changes significantly after freezing and thawing. A fresh batch takes just 35 minutes so making them fresh each time is always the right choice.
Make It Even Better (Pro Tips)
- Grease the muffin tin very generously — every cup including the top rim — to ensure the puffs release cleanly after baking without tearing their beautifully golden sides.
- Let the dough cool for the full 3 to 5 minutes before adding the eggs — adding eggs to dough that is too hot can begin to cook them and prevent the batter from becoming smooth and glossy.
- Add the eggs one at a time and beat well after each addition — the batter will look curdled and separated at first but comes together into a smooth, glossy consistency as you continue beating. This is completely normal and the process.
- Fill each muffin cup only halfway — the puffs expand dramatically during baking and overfilled cups will overflow and stick to the top of the tin.
- Never open the oven during baking — not even to check. The steam is essential to the dramatic rise and opening the door even briefly can cause the puffs to deflate before they have set.
- Sprinkle with sugar while still hot from the oven — the residual heat from the puffs melts the sugar slightly and helps it adhere to the crispy surface beautifully.
- Serve within 15 minutes of baking for the most dramatic crispy exterior and the softest, most satisfying custardy interior.
Easy Ways to Change It Up
- Vanilla version: Add 1 teaspoon of pure vanilla extract to the batter after beating in all the eggs for a more fragrant, delicately flavored puff that pairs beautifully with fresh berries and whipped cream.
- Cinnamon sugar topping: Replace the plain granulated sugar sprinkle with a cinnamon sugar mixture for a warm, spiced coating that makes these puffs taste like a churro in pastry form.
- Lemon zest addition: Stir a teaspoon of fresh lemon zest into the batter along with the eggs for a bright, citrusy note that pairs beautifully with honey and fresh raspberries.
- Savory version: Omit the sugar from the batter and the topping and add 1/4 cup of finely grated Parmesan and a pinch of black pepper for a savory puff that works beautifully as an elegant dinner bread or appetizer.
- Chocolate drizzle: Replace the honey drizzle with melted dark chocolate for a more indulgent, dessert-style serving that makes these puffs feel genuinely special and celebration-worthy.
Quick Questions
Why did my puffs deflate after baking?
The most common cause is opening the oven door during baking before the puffs have had time to set their crispy structure. The dramatic rise of these puffs is driven by steam — releasing that steam by opening the door before the exterior is fully crisp and set causes them to collapse immediately. Bake for the full 20 to 25 minutes without opening the door even once. If they deflate after removing from the oven that is normal — they settle slightly as they cool but should retain their basic domed shape.
Can I make the batter ahead of time?
The batter is best used immediately after mixing while it is at its freshest and the eggs are still fully incorporated into the dough. If you need to get ahead, the dough can be made up to 1 hour before baking and stored covered at room temperature — give it a good stir before filling the muffin cups. Do not refrigerate the unbaked batter as the cold temperature prevents the puffs from rising properly in the oven.
Are Nun’s Puffs the same as choux pastry?
They use the same base technique — cooking flour into hot fat and liquid then beating in eggs — but Nun’s Puffs traditionally use milk instead of water and bake in muffin tins rather than being piped and baked freeform. The result is softer and more custardy on the inside than classic choux pastry eclairs or cream puffs, with a slightly richer flavor from the milk and a more defined, contained shape from the muffin tin. Think of them as a softer, more homestyle cousin of classic choux pastry.
Make these Nun’s Puffs for your next breakfast or brunch and discover the most surprisingly wonderful pastry you have ever pulled from a muffin tin. Tried them? Leave a comment below and tell me what topping or serving combination you loved most! — AVA
Classic Nun’s Puffs
Ingredients
Equipment
Method
- Preheat the oven to 400°F. Generously grease a standard 12-cup muffin tin.
- In a medium saucepan, heat the butter and milk over medium heat until the butter melts and the mixture just begins to simmer.
- Remove from the heat and stir in the flour all at once until a smooth dough forms and pulls away from the sides of the pan.
- Cool the dough for 3–5 minutes. Beat in the eggs one at a time until fully incorporated, then stir in the optional sugar.
- Fill each muffin cup about halfway with the batter.
- Bake for 20–25 minutes until tall, deeply golden, and crisp. Do not open the oven door during baking.
- Allow the puffs to cool for a few minutes in the muffin tin.
- Sprinkle with granulated sugar and drizzle with honey. Serve warm with whipped cream and fresh fruit if desired.