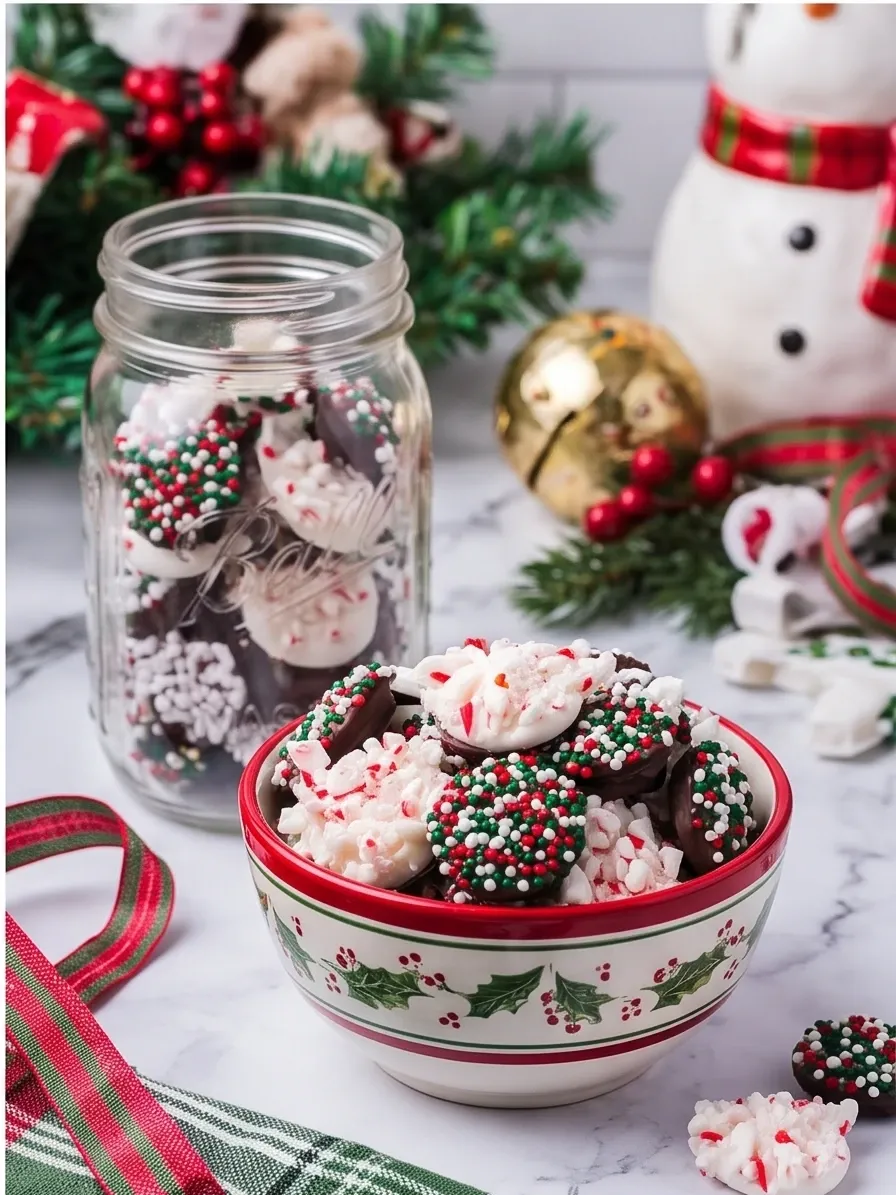
Chocolate Christmas Candy is the easiest holiday treat you can make with a piping bag and a microwave. Sweet chocolate, crunchy sprinkles, and cool peppermint come together in little festive bites that look like they came from a candy shop. If you love minty chocolate at Christmas, you will also enjoy these Christmas Ritz Cracker Caramel Chocolate Cups.
There is no baking and no candy thermometer here. You pipe melted chocolate onto sprinkles and crushed candy canes, let it set, and lift the candies off with a fork. They are perfect for cookie boxes, gift jars, and holiday snack tables.
Why You’ll Make This Again
- No baking: Everything happens in the microwave, so the oven stays free for other holiday cooking.
- Ready in 20 minutes: Fifteen minutes of work and about five minutes to set.
- Two kinds in one batch: Semi-sweet and white chocolate give you a pretty variety.
- Only five ingredients: Chocolate, sprinkles, and candy canes are all you need.
- Great for gifting: They keep well and look lovely in jars and gift bags.
How This Comes Together
The sprinkles and crushed candy canes act as both the topping and the base. You pipe small circles of melted chocolate right onto them, so each candy picks up a crunchy, colorful coating as it sets. Once the chocolate is firm, you simply lift each piece off with a fork.
What You’ll Need
- 2 cups semi-sweet melting chocolate
- 2 cups white chocolate melting wafers
- ½ cup white nonpareil sprinkles
- ½ cup red, green, and white nonpareil sprinkles
- ½ cup crushed candy canes
Prep Time: 15 minutes | Cook Time: 0 minutes | Total Time: 20 minutes | Serves: 4 cups
Estimated Nutrition: Approximately 840 calories and 5 g protein per cup.
Step-by-Step Directions
Step 1: Set Up the Toppings
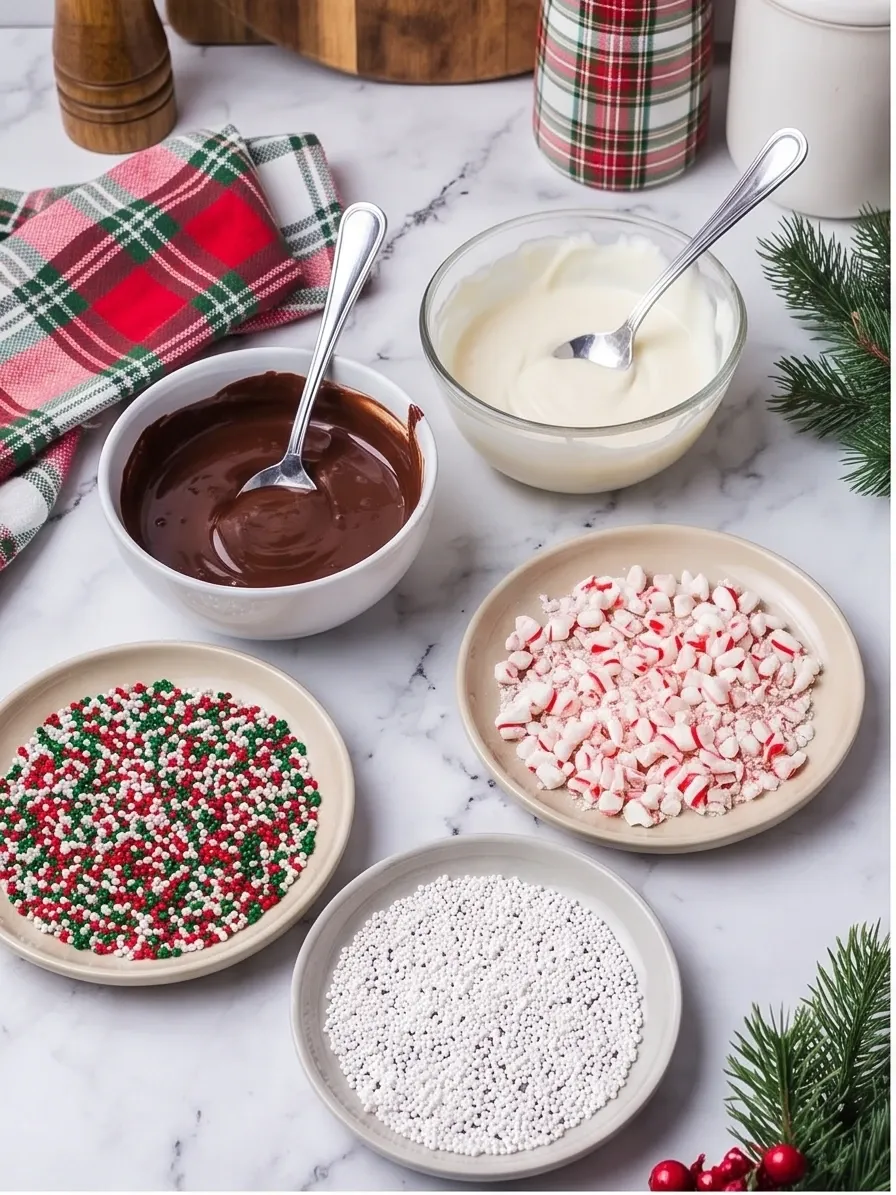
Arrange the white sprinkles, Christmas-colored sprinkles, and crushed candy canes in three separate rows on a shallow dish or three small plates. Make each layer about ¼ inch deep.
Step 2: Melt the Dark Chocolate
Place the semi-sweet melting chocolate in a microwave-safe bowl. Melt according to the package instructions, stirring until smooth.
Step 3: Fill the Piping Bag
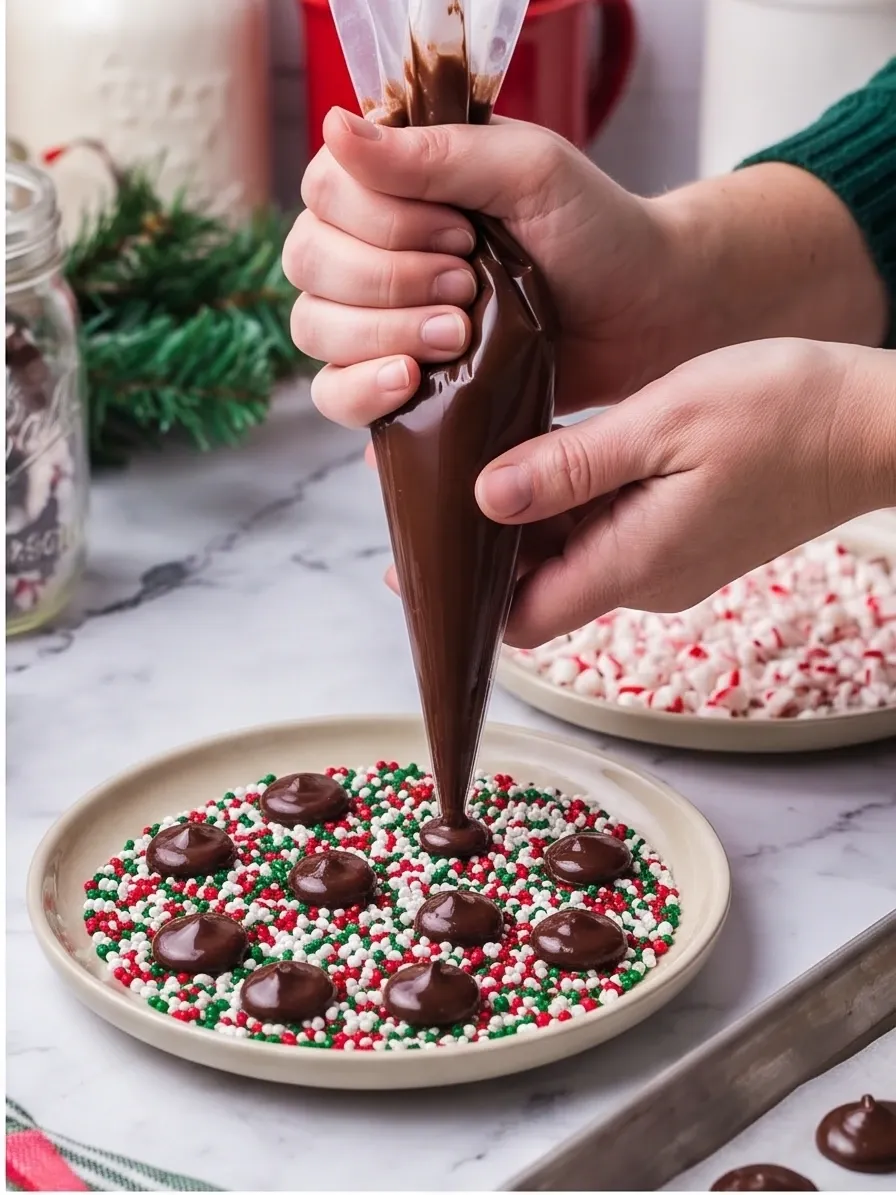
Transfer the melted chocolate to a piping bag or a zip-top bag with a small corner snipped off.
Step 4: Pipe the Candies
Pipe small circles, about ½ inch wide, directly onto the sprinkles and crushed candy canes. Continue until you’ve used all the chocolate or about half of the sprinkles.
Step 5: Let Them Set
Let the candies sit for about 5 minutes, or until completely firm. You can place them in the refrigerator briefly to speed up the process.
Step 6: Lift Them Off
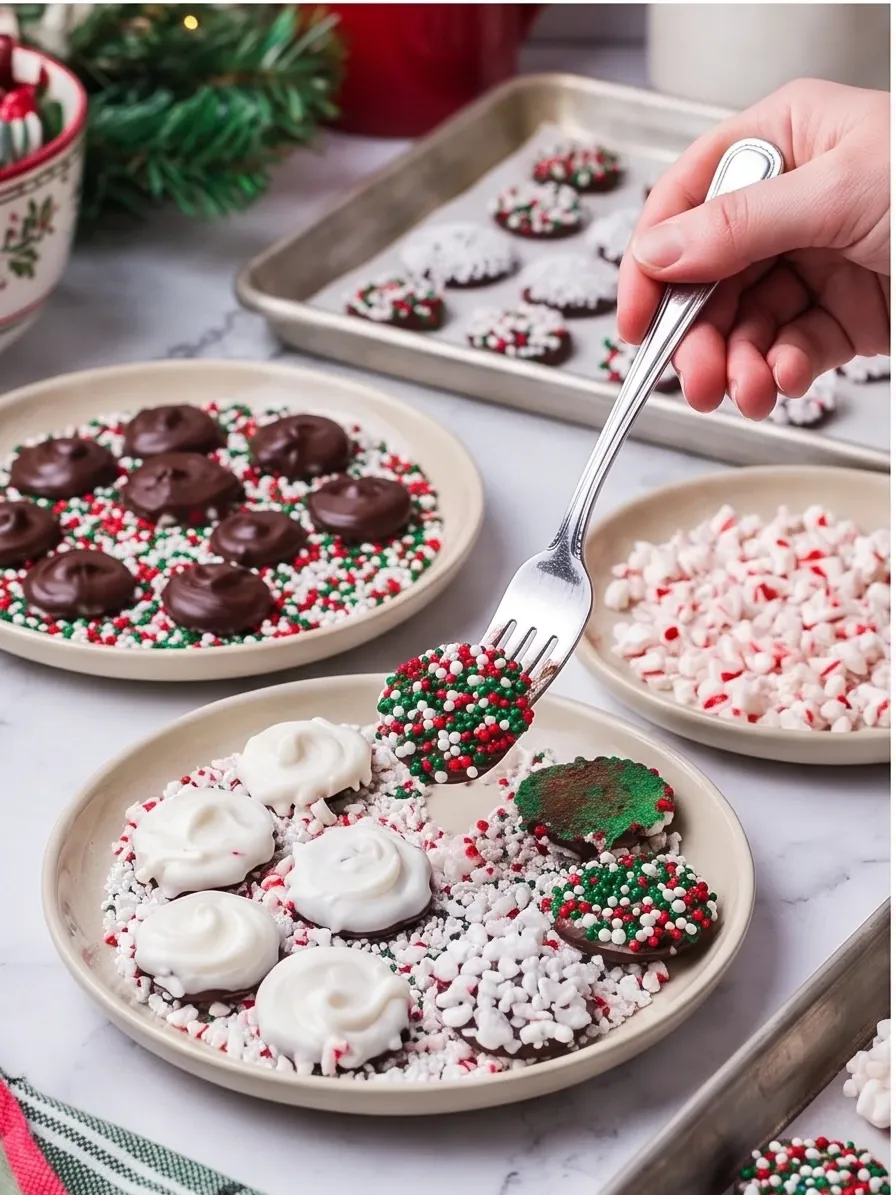
Once hardened, gently lift the candies from the sprinkles using a fork.
Step 7: Make the White Chocolate Candies
Repeat the process with the white chocolate melting wafers, melting them until smooth before piping onto the remaining sprinkles and candy canes.
Step 8: Let the White Chocolate Harden
Let the white chocolate candies harden completely, then remove them from the sprinkles.
Step 9: Pack and Share
Transfer all the finished candies to a festive bowl, mason jar, or holiday gift bags. Enjoy or give as homemade Christmas treats!
How to Serve It
Pile the candies in a festive bowl for a holiday party, or pack them in a mason jar with a ribbon. They also look pretty next to a plate of Easy Homemade Chocolate Truffles on a dessert table. Serve at room temperature or chilled.
Leftovers & Storage
- Room temperature: Store in an airtight container for up to 2 weeks, in a cool, dry place.
- Refrigerator: Keep in an airtight container for up to 4 weeks.
- Freezer: Freeze for up to 5 months in a freezer-safe airtight container.
- Serving tip: Serve at room temperature or chilled. Avoid warming the candies, as the chocolate will melt.
Make It Even Better: Pro Tips
- Stir well: Melt according to the package directions and stir until completely smooth so the chocolate pipes cleanly.
- Keep a ½-inch size: Small circles set quickly and are easy to lift with a fork.
- Layer sprinkles evenly: About ¼ inch deep gives a full, crunchy coating on every candy.
- Use the fridge to hurry things up: A short chill helps if your kitchen is warm.
Easy Ways to Change It Up
- Single color batch: Make only dark or only white chocolate candies for a neat, uniform look.
- Different toppings: Try other festive sprinkles or crushed peppermint candies in place of the candy canes.
- Gift jars: Layer the dark and white candies in a clear jar for an instant homemade gift.
Quick Questions
Can I use regular chocolate chips?
Melting chocolate and wafers are made to melt smoothly and set firm, so they work best for piping. This recipe is written for them.
How do I know when the candies are ready?
They are done when the chocolate is completely firm, about 5 minutes. A short rest in the refrigerator speeds this up.
How long do they keep?
They keep for up to 2 weeks at room temperature, up to 4 weeks in the refrigerator, and up to 5 months in the freezer, in an airtight container.
Can I serve them warm?
No. Serve them at room temperature or chilled, because warmth will melt the chocolate.
Can I give them as gifts?
Yes. They look lovely in a mason jar or in holiday gift bags.
A Sweet Little Holiday Tradition
These Chocolate Christmas Candies are quick, cheerful, and a joy to make with family. Set out the sprinkles, pipe a few circles, and in minutes you have a tray of festive treats.
I hope they bring a little sweetness to your holiday table this year.
— Ava
Chocolate Christmas Candy
Ingredients
Method
- Arrange the white sprinkles, Christmas-colored sprinkles, and crushed candy canes in three separate rows on a shallow dish or three small plates. Make each layer about ¼ inch deep.


- Place the semi-sweet melting chocolate in a microwave-safe bowl. Melt according to the package instructions, stirring until smooth.
- Transfer the melted chocolate to a piping bag or a zip-top bag with a small corner snipped off.
- Pipe small circles, about ½ inch wide, directly onto the sprinkles and crushed candy canes. Continue until you’ve used all the chocolate or about half of the sprinkles.

- Let the candies sit for about 5 minutes, or until completely firm. You can place them in the refrigerator briefly to speed up the process.
- Once hardened, gently lift the candies from the sprinkles using a fork.

- Repeat the process with the white chocolate melting wafers, melting them until smooth before piping onto the remaining sprinkles and candy canes.
- Let the white chocolate candies harden completely, then remove them from the sprinkles.
- Transfer all the finished candies to a festive bowl, mason jar, or holiday gift bags. Enjoy or give as homemade Christmas treats!

Notes
- Store in an airtight container at room temperature for up to 2 weeks, in a cool, dry place.
- Refrigerate in an airtight container for up to 4 weeks.
- Freeze for up to 5 months in a freezer-safe airtight container.
- Serve at room temperature or chilled. Avoid warming the candies, as the chocolate will melt.