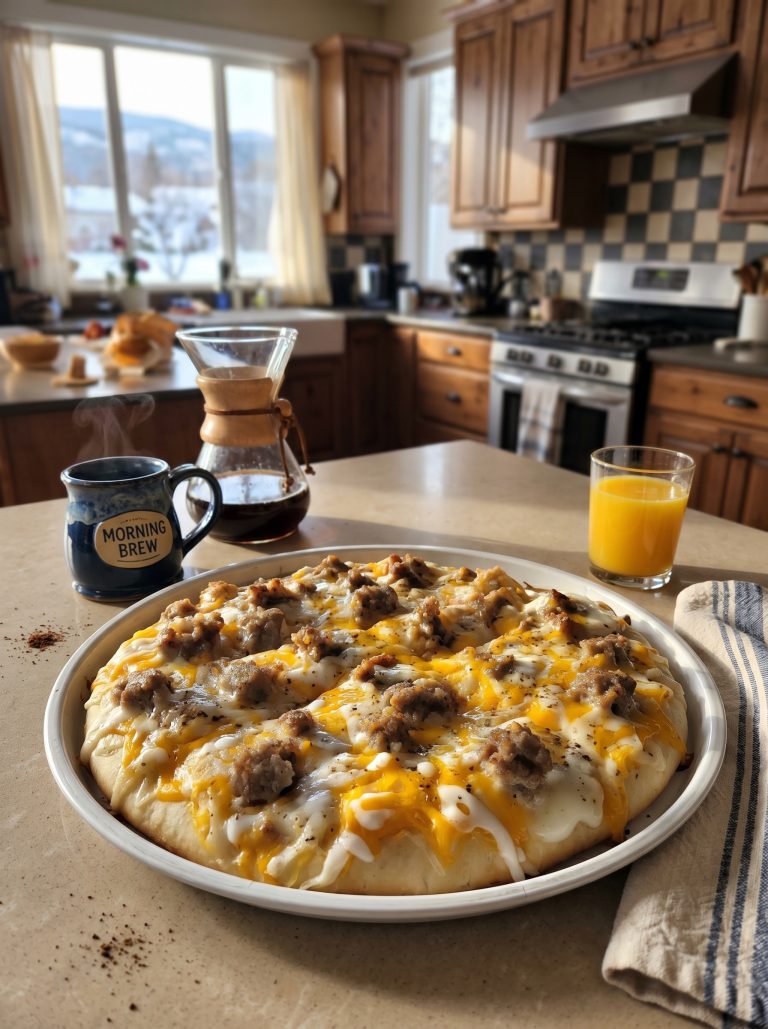
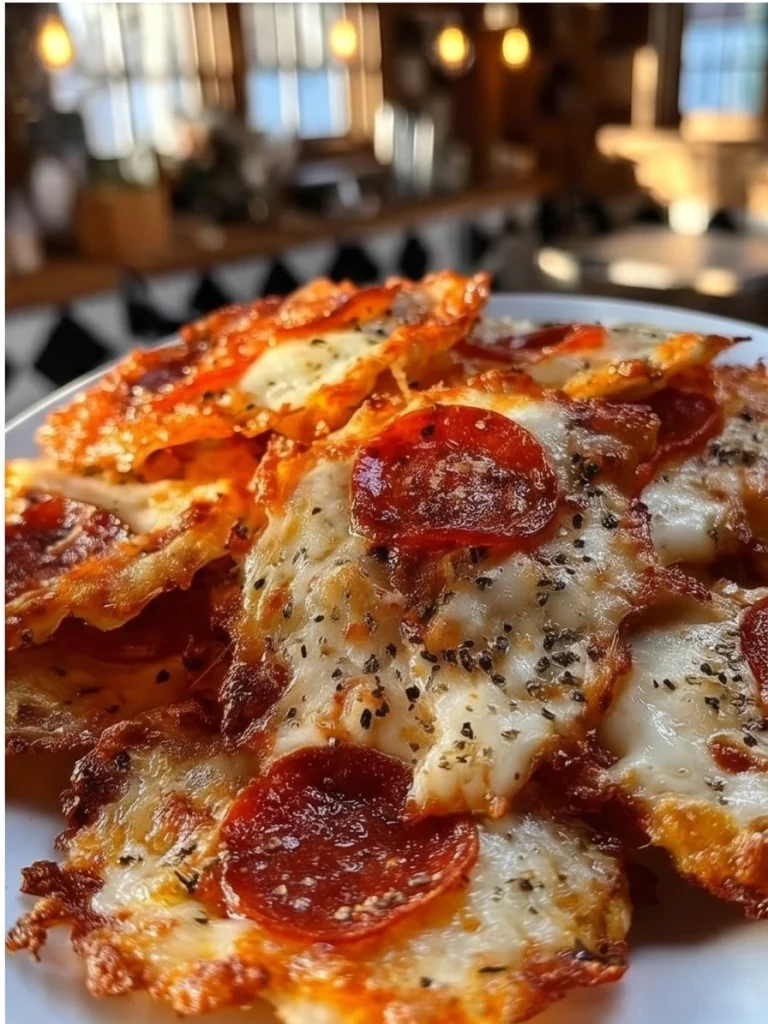
Two ingredients. Seventeen minutes. The most addictive low-carb snack you will ever make. These 2-ingredient pizza chips are the kind of recipe that sounds too simple to be this good — and then you make them and immediately understand why they disappear so fast. Crispy, golden cheese with bubbly pepperoni on top — every single familiar pizza flavor in a bite-sized, keto-friendly chip that requires zero dough and zero skill. This is snacking at its most brilliantly simple.
Movie night, game day, quick afternoon snack, or party nibble — these chips fit every occasion and always earn the same reaction from everyone who tries them for the first time.
Why You’ll Make This Again
The magic here is in what cheese does when you bake it at high heat. It melts, spreads, and then as it cools it sets into a genuinely crispy, lacy chip with a satisfying crunch that feels completely indulgent. The pepperoni on top adds its own fat and flavor to the chip as it bakes — getting slightly caramelized and intensely savory in a way that tastes exactly like the best part of a pizza slice. At just 150 calories and 12 grams of protein per serving, these are the snack that makes low-carb and keto eating feel like genuinely eating well rather than giving anything up. Two ingredients, two minutes of prep, and a result that makes everyone reach for more.
These work beautifully all year round but are especially wonderful for game day spreads, holiday party platters, and any casual gathering where you want something everyone can snack on without a second thought. Low-carb, gluten-free, and completely crowd-pleasing.
How This Comes Together
Mound the cheese, flatten, top with pepperoni, bake, cool, and serve. That is genuinely the entire recipe. The cooling time after baking is the one step people always want to skip and absolutely should not — the chips look soft and slightly flexible when they first come out of the oven but firm up into genuinely crispy chips as they cool on the baking sheet over the next 2 to 3 minutes. Pull them too soon and they bend. Give them the cooling time and they snap. Two minutes of patience makes all the difference.
What You’ll Need
Just two ingredients — seriously. Use low-moisture shredded mozzarella for the crispiest chips, or sharp cheddar for a more intensely flavored result.
- 1 cup shredded mozzarella or cheddar cheese
- 20 pepperoni slices
Step-by-Step Directions
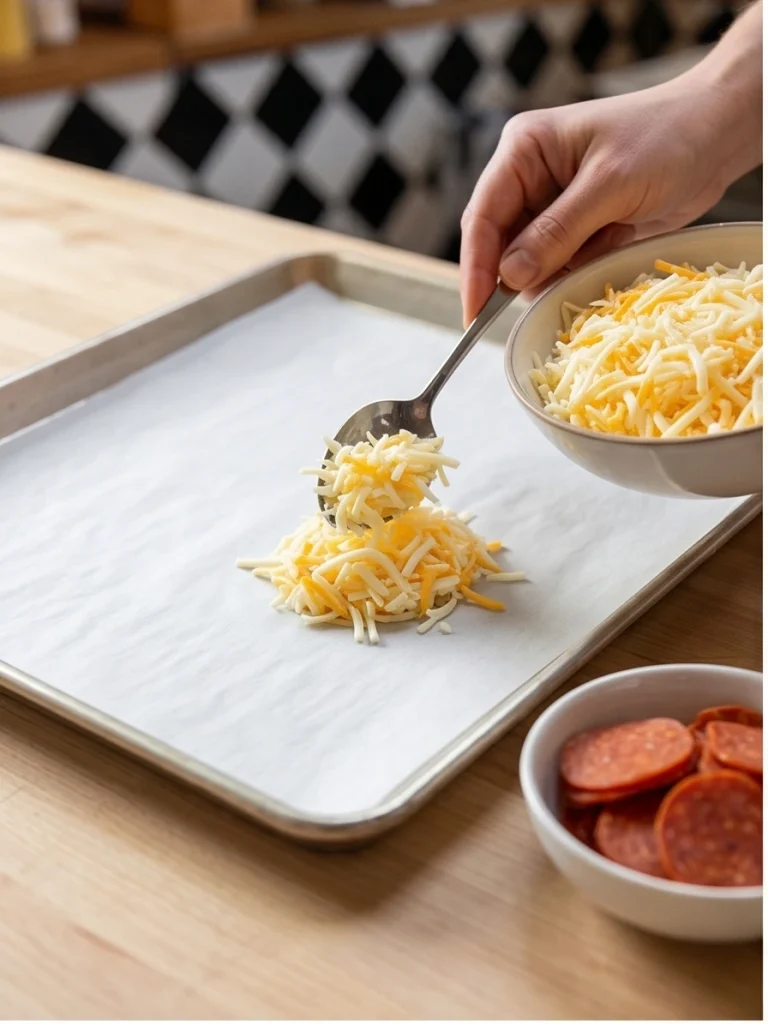
Step 1: Prepare the Cheese Mounds
Preheat oven to 400°F. Line a large baking sheet with parchment paper. Place small mounds of shredded cheese on the prepared baking sheet, spacing them about 2 inches apart to allow room for spreading. Gently flatten each cheese mound with the back of a spoon into an even, thin round.
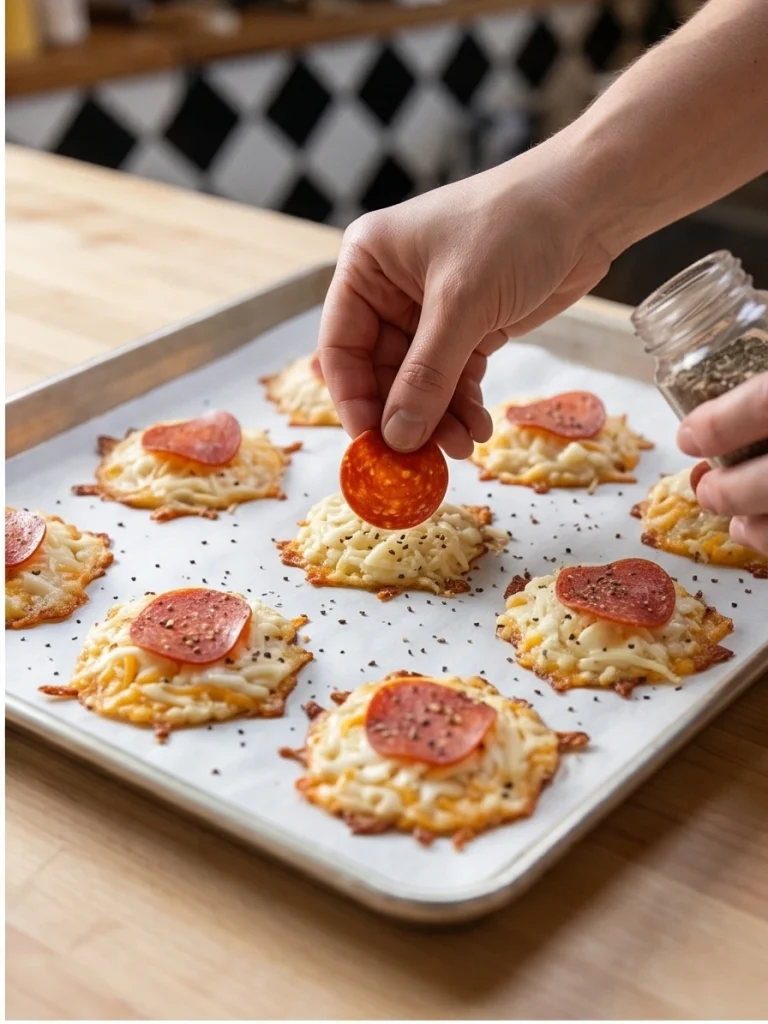
Step 2: Add the Pepperoni
Place one pepperoni slice on top of each flattened cheese mound.
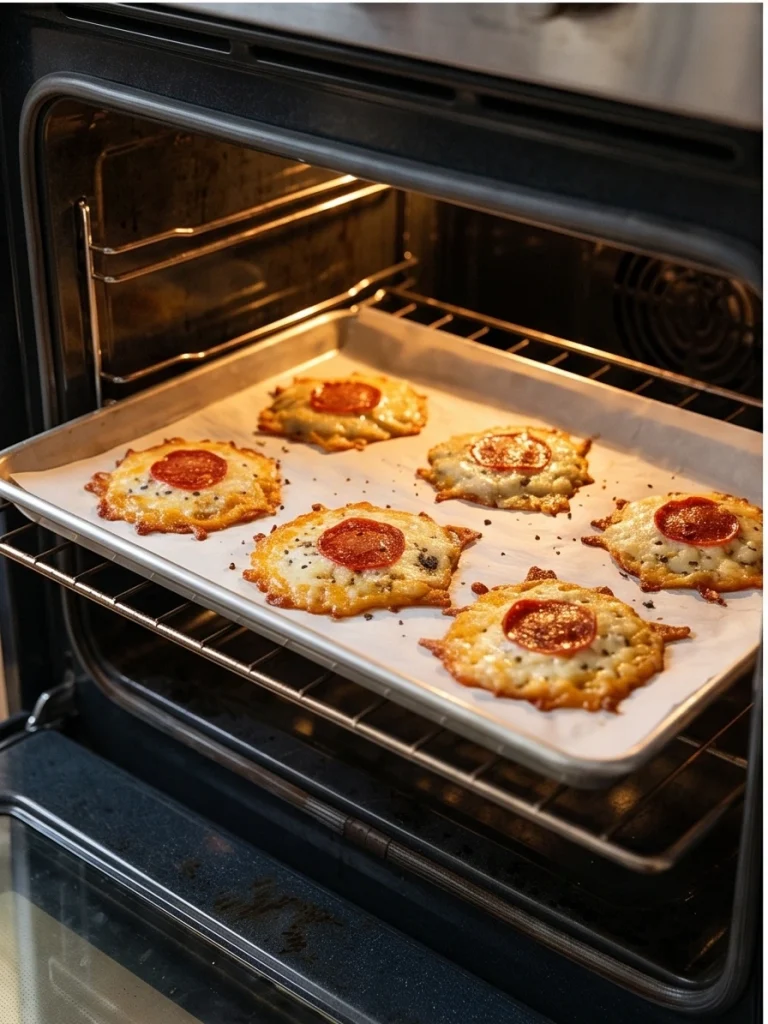
Step 3: Bake the Chips
Bake for 5–7 minutes until the cheese is fully melted and the edges are golden brown and lacy.
Step 4: Cool and Serve
Remove from the oven and allow to cool on the baking sheet for 2–3 minutes — the chips firm up and crisp significantly as they cool. Serve warm on their own or alongside a small bowl of marinara sauce for dipping.
How to Serve It
Arrange the cooled chips on a large plate or wooden board and set a small bowl of warm marinara sauce right in the center for dipping. They look absolutely stunning — golden, lacy edges with the slightly caramelized pepperoni on top — and they taste even better than they look straight from the baking sheet. For a party spread, double or triple the batch and set them out alongside other finger foods and cold drinks. For a movie night snack, pile them in a bowl and dip every single one into marinara — it is the closest thing to pizza you can eat without touching a single carb.
Leftovers & Storage
Store cooled chips in an airtight container at room temperature for up to 2 days. Keep them uncovered for the first 30 minutes after making to allow any remaining steam to escape before sealing — sealing too early traps moisture and softens the chips. If they lose their crunch after a day, spread on a baking sheet and return to a 400°F oven for 3–4 minutes to re-crisp them completely — they come back beautifully with just a few minutes of heat. These are so quick to make fresh that a new batch in 17 minutes is always the best option. They do not freeze well as the cheese texture changes significantly after thawing.
Make It Even Better (Pro Tips)
- Use low-moisture shredded mozzarella — fresh mozzarella contains too much water and will not crisp up properly in the oven.
- Flatten each cheese mound as thin and even as possible — a thicker mound takes longer to crisp and the edges can burn before the center sets properly.
- Space the mounds at least 2 inches apart — the cheese spreads significantly during baking and overlapping chips merge together rather than forming individual crispy rounds.
- Watch the oven closely during the last 2 minutes — the difference between perfectly golden and overdone happens very quickly at 400°F with this small amount of cheese.
- Use parchment paper rather than foil — parchment releases the chips cleanly once cooled while foil can cause them to stick.
- Let them cool the full 2 to 3 minutes — this is the step that turns soft melted cheese into genuinely crispy chips that snap when you pick them up.
- Add a tiny pinch of Italian seasoning or red pepper flakes over the pepperoni before baking for a more complex pizza flavor that makes these chips even more addictive.
Easy Ways to Change It Up
- Different toppings: Swap pepperoni for mini salami slices, cooked crumbled sausage, or diced cooked bacon for a completely different but equally delicious flavor combination.
- Veggie version: Skip the pepperoni and top each cheese mound with a small slice of olive, a sun-dried tomato piece, or a tiny basil leaf pressed gently into the cheese before baking.
- Different cheese: Try a blend of mozzarella and Parmesan for extra sharpness and a more intensely flavored chip, or use pepper jack for a spicy version with a kick.
- Margherita style: Top the cheese with a tiny half cherry tomato and a small basil leaf added in the last minute of baking for a fresh, classic margherita pizza flavor.
- Everything seasoning: Sprinkle everything bagel seasoning over the cheese before adding the pepperoni for a bold, complex flavor that makes these chips genuinely irresistible.
Quick Questions
Can I make these in the microwave?
Yes — place cheese mounds on a microwave-safe plate lined with parchment paper, top with pepperoni, and microwave on high for 60–90 seconds until the cheese is melted and bubbly. The result is less golden and crispy than the oven version but still delicious and significantly faster. Allow to cool for 2 to 3 minutes after microwaving — the chips firm up more as they cool than they do with oven baking so the cooling step is even more important here.
Can I make these in the air fryer?
Yes — air fry at 375°F for 4–5 minutes until golden and crispy. Work in small batches and use a parchment liner cut to fit the basket. The circulating heat of the air fryer actually produces an even crispier chip than the oven in slightly less time — it is an excellent alternative if you want a faster result or are making a smaller batch for one or two people.
What is the best cheese to use for the crispiest chips?
Low-moisture shredded mozzarella gives the most neutral, classically pizza-flavored chip with clean, lacy golden edges. Sharp cheddar produces a more intensely flavored chip with a slightly denser crisp. Parmesan gives the most aggressively crispy, deeply savory chip of all three but browns the fastest so watch it closely. Avoid fresh or high-moisture cheeses — they contain too much water to crisp properly and will produce soft, greasy results rather than the crispy chips you are looking for.
Make these 2-ingredient pizza chips for your next snack or gathering and discover the fastest, most satisfying low-carb snack in your entire recipe collection. Tried them? Leave a comment below and tell me what topping combination you used!— AVA

Creamy Spinach and Mushroom Stuffed Chicken
Ingredients
Equipment
Method
- Preheat oven to 375°F. Lightly grease a baking dish and set aside.
- Heat olive oil in a skillet over medium heat. Add mushrooms and garlic and cook for 4–5 minutes until softened and moisture has evaporated.
- Stir in spinach and cook for 1–2 minutes until wilted. Remove from heat.
- Add cream cheese and mozzarella. Season with salt and black pepper and stir until smooth and creamy. Allow to cool slightly.
- Using a sharp knife, cut a deep horizontal pocket into the thickest side of each chicken breast without cutting all the way through.
- Divide the filling evenly among the chicken breasts and stuff each pocket. Secure with toothpicks.
- Season the outside of each chicken breast with paprika, salt, and black pepper.
- Arrange the stuffed chicken breasts in the prepared baking dish.
- Bake for 25–30 minutes until golden and the internal temperature reaches 165°F.
- Remove toothpicks and serve with your favorite side dishes.